Реклама
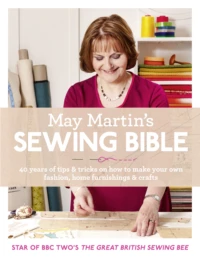
Читать книгу: «May Martin’s Sewing Bible: 40 years of tips and tricks»

Copyright
HarperCollinsPublishers 77–85 Fulham Palace Road, Hammersmith, London W6 8JB
First published by HarperCollinsPublishers in 2014
FIRST EDITION
© May Martin 2014
Cover layout design © HarperCollinsPublishers Ltd 2014
Cover photograph © Ali Allen 2014
May Martin asserts the moral right to be identified as the author of this work
Every effort has been made to contact the copyright holders but the publishers would be glad to hear of any omissions.
Designer: Lucy Sykes-Thompson
Project Editor: Sarah Hoggett
Copy Editor: Kate Parker
Illustrators: Stephen Dew
Photographer: Ali Allen
Stylist: Alice King
Hair and Make-up Artist: Sarah Matheson
All rights reserved under International and Pan-American Copyright Conventions. By payment of the required fees, you have been granted the nonexclusive, non-transferable right to access and read the text of this e-book on screen. No part of this text may be reproduced, transmitted, downloaded, decompiled, reverse engineered, or stored in or introduced into any information storage retrieval system, in any form or by any means, whether electronic or mechanical, now known or hereinafter invented, without the express written permission of HarperCollins e-books.
Find out about HarperCollins and the environment at www.harpercollins.co.uk/green
Source ISBN: 9780007573042
Ebook Edition © JULY 2014 ISBN: 9780007573059
Version: 2014-08-15
Contents
Cover
Title Page
Copyright
Introduction
TIPS & TRICKS
 Where to Start
 Equipment
 Techniques
CRAFTS
 Table Runner
Napkins & Napkin Rings
Log Cabin Patchwork
Express Bunting
Doorway Puppet Theatre
Hand Puppets
Christmas Decorations
Christmas Stocking
Sewing Tidy Bag
Pyramid Box
HOME FURNISHINGS
Cushions
Roman Blind
Curtains
ACCESSORIES
 Snood
Snood
Man’s Apron
Child’s Smock Apron
Cape
Bucket Bag
ADULTS’ FASHION
Shell Blouse
Shift Dress
Pencil Skirt
Bonded Bodice
Man’s Waistcoat
KIDS’ FASHION
 Jersey T-shirt
Trousers & Shorts
Dungarees
Toddler Dress
Romper Suit
Smocked Dress
Templates
Glossary
My Little Black Book
Acknowledgements
About the Publisher


Introduction
I have been a textile tutor for over 40 years and I love my job. I couldn’t imagine doing anything more enjoyable. I have a passion for my subject and I love sharing my skills with other people – nothing gives me greater pleasure than helping my students and seeing them progress. At school I was not particularly academic, but I discovered that I could sew and I will never forget the sheer delight of completing my first project, a grey pencil skirt. I trained as a needlework teacher and taught at various schools for several years until my children arrived. I branched into adult education because I could fit it around my family, and I’ve been teaching students of all ages ever since.
Sewing has become hugely popular again. I’ve seen it in the growing numbers of students signing on for classes and in the appeal of TV programmes like The Great British Sewing Bee, for which I had the privilege of being one of the judges. What was striking about the programme was how well the contestants bonded with each other, and this is something that I’ve noticed in my own classes. People love to help each other and share their ideas. As a teacher, I find I learn so much from my pupils. I’ve even included a few tips in the here that they’ve shown me, such as the technique for double binding the edge of patchwork to make beautiful mitred corners.
In this book, I have tried to gather together some of the tips and tricks I’ve learned over the years. Along the way, I’ve discovered different methods of tackling particular techniques that make them easier as well as producing a better finish, and my aim is to share some of the tips that my students have found most helpful. I’ve begun with the basics – where to sew and what equipment you’ll need – and offered advice on the ‘raw materials’ of a project, from choosing fabric and thread to selecting and laying out a pattern. And I’ve presented some of the fundamental techniques that are so important in sewing, from how to make different types of seams and hems to such processes as creating your own binding (really easy if you have the right gadget) and forming ‘magic’ rouleau loops. At every point, I’ve tried to demystify the subject for beginners – explaining pattern terms and markings, for instance – while at the same time providing ideas for those with more experience to help enhance their sewing knowledge.
In the second part of the book, I’ve presented a range of projects to suit varying degrees of skill and ability – beginner, intermediate and more advanced. The skill level is shown at the start of each project. Beginner projects only require straight seams and simple hand stitching; intermediate projects involve curved seams, bound edges and relatively easy fastenings such as drawstrings or centred zips; the more advanced feature facings, interlinings, and matching fabric patterns and may involve assembling several different components. With these I’ve tried to give a taste of every type of sewing project you might be tempted to try, from craft work – how to make your own bunting or a beautiful puppet theatre, complete with puppets – to home furnishings, from a Roman blind to a boxed cushion cover. There are a number of dressmaking projects too, a range of items for both adults and children. These are linked to actual patterns that you can buy – and which you will need for the pattern pieces and full assembly instructions – but you don’t have to be restricted to these. My aim has been to try to bring them alive by focusing on particular techniques – such as how to insert an invisible zip or make a smocked panel for a little girl’s dress – which you can add to your repertoire and use again and again in other projects, building your skills all the time.
It is a privilege to be in a position to reach a wider audience and share what I’ve learned over the years. It has given me so much pleasure to teach others, helping and guiding them. I hope this book conveys some of that joy so that you in turn will be inspired to begin your own sewing journey.


A Place to Sew & the Equipment you Need

Essentials for your Sewing Space
Once you’ve identified your sewing space, here are a few basics that I’d recommend:
An electric socket – for plugging in your sewing machine and an extension lead. The power cables on sewing machines are never long enough!
A good lamp – I have an old Anglepoise with a daylight bulb in it – invaluable for ensuring you have enough light to work by, and not just on gloomy winter days.
A comfortable chair – at just the right height for you while you’re seated at the sewing machine.
A table – pasting table, folding table, kitchen table, even an ironing board – for cutting out your fabric.
Clear plastic boxes – to store fabrics, threads and haberdashery. I find it invaluable to see instantly where everything is.
Essential Tools
For your basic sewing kit, you’ll need the following items:
Hand-sewing needles – sharps (all-purpose) for hand-sewing, curved needles for craft, crewel (with a long eye) for embroidery. A needle threader is also invaluable.
Pins – dressmaker’s and glass-headed.
Thimble – metal, plastic or leather – for protecting the tips of your fingers when you’re hand-sewing.
Measures – A standard tape measure is 152cm (60in); an extra-long tape measure (30-cm/120in) is really useful when making curtains. A ruler comes in very handy, too, especially a gridded ruler with angles marked.
Pin cushion – to keep pins handy.
Cutting tools – scissors in different sizes, including dressmaker’s shears (25cm/10in), medium embroidery/needlework scissors (13cm/5in), small embroidery scissors (10cm/4in), paper-cutting scissors; and, perhaps not essential but extremely useful, pinking shears, sewing snips, stitch ripper.
Markers – chalk pencils, chalk wheels, air- and water-soluble marker pens (see here), dressmaker’s chalk, tracing wheel and carbon paper (see here).
Tracing or dressmaker’s carbon paper and tracing wheel – to copy designs and pattern markings (see here).
Coloured tape – to make a sewing guide on the throat plate of the sewing machine, and masking tape.
Essential Tools 1
1. Dressmaker’s shears – good for cutting fabric
2. Medium sewing scissors – good for trimming seams and cutting threads.
3. Small scissors – these are useful for clipping corners and cutting details
4. Paper scissors
5. Stitch ripper – really useful for cutting and pulling out threads
6. Tape measure – 150cm (6oin)
7. Double-length (soocm/120in) tape measures are now available and are really useful when cutting out curtains and blinds
8. Universal ruler with inch scale
9. Sewing gauge with sliding adjustergood for measuring seam allowances and hems
10. Small measuring gauge – this has lots of different measurements on the sides
11. Tailor’s chalk
12. Tracing wheel
13. Tracing or dressmaker’s carbon paper, used with a tracing wheel
14. Retractable pencils – they give a fine line that can be rubbed out with a fabric eraser.
15. Quilter’s 6mm (¼ in) tape – helps to guide rows of stitching
16. Coloured tape – useful for putting on the arm of the sewing machine to guide you
17. Pins – dressmaker’s
18. Pins – glass-headed
19. Metal thimble
20. Leather thimble
21. Selection of hand sewing needles
22. Needle threader
23. Corner and edge shaper
24. Chopstick – used for turning out tricky corners
25. Safety pins – used for threading elastic or tape into channels.
26. Wrist pin cushion
Essential Tools 1

Essential Tools 2
1. Seam roll
2. Tailor’s ham
3. Sleeve board
4. Pressing muslin
5. Squared pattern paper
6. Curved needles
7. Pinking sheers
8. Awl – good for making holes in card
9. Universal ruler with centimetre scale
10. Flexible ruler – for measuring and marking curves
11. Parcel strapping
12. Chalk cartridge pencil
13. Coloured refills for chalk cartridge pencil
14. Brass rings attached to paper fasteners
15. Chalk-filled tracing wheel
16. Soluble marking pen
17. Bodkin
18. Expanding gauge – excellent for spacing buttonholes, pleats and more
19. Button press
20. Button for covering
21. Fabric rubber
22. Fabric glue
23. Tape and binding makers. These are handy gadgets and come in different sizes; the fabric is threaded through and the edges are rolled under to form bias or straight binding.
24. Beeswax – before doing any hand sewing, run the thread through the wax; this will prevent it from tangling and will make it stronger.
25. Rotary cutter – this is a specialist cutter with a rotary blade that can cut through several layers of fabric at once. Use only with its special mat and ruler. Very useful for cutting parallel trims, bias strips, pieces for patchwork and much more.
26. Cutting mat
27. Chisel and block to cut buttonholes
28. Hole reinforcements
29. Weights
Essential Tools 2

Useful Additions to your Kit
The following items, while not essential, can come in very handy for different projects:
Bodkin –for pulling elastic through a casing.
Bridal and lace pins – finer pins for using with delicate fabrics and projects such as wedding dresses.
Sewing gauge – great for spacing buttons and buttonholes without measuring.
Flexible curve ruler – very useful for marking curves (such as for the Man’s Apron).
Rotary cutter – especially useful for quilting, but great for cutting any straight edge with the aid of a ruler and cutting mat.
Craft hole punch – for making holes in leather and card.
Bias binding and tape maker – these come in different sizes and are really useful for making straight or bias tape.
Beeswax – waxing thread prevents tangling.
Fabric eraser – for rubbing out marks on cloth.
Sewing Machine
It goes without say that, for most sewing projects, a sewing machine is vital, and I’ve devoted a whole section to it – see here.
Overlocker
An overlocker is a much more specialised piece of equipment, but it creates a really professional finish to garments – see here for further details.
Iron & Ironing Board
An iron and ironing board are needed at every stage of a sewing project, so it’s a good idea to set them up in a convenient location before you start. The ironing board comes in handy as an extra work surface, too. Put two ironing boards together with a board on the top and you have an adjustable-height work surface!
Other useful pressing aids are:
A seam roll – this is a padded tube, great for pressing seams inside sleeves and trouser. The roll holds the seam edges away when pressing so the indents don’t occur. For a bargain alternative, go to your local fabric shop and pick up a tube from the middle of a roll of fabric. Wrap it in a thin towel – and hey presto, you have a seam roll! The longer length of this tube is excellent for pressing long seams such as the table runner. You could even use a tube of cardboard from inside a roll of kitchen paper or plastic food wrap.
Sleeve boards – a sleeve board is like a mini ironing board on legs – it stands on your ironing board and is great for pressing tubes such as sleeves and trouser seams. They are also useful when pressing children’s clothes, which have small, fiddly seams and shaping.
Brown paper, printer paper, sugar paper – cut into strips and position under your seam allowances to prevent them from imprinting on the right side of the garment.
Tailor’s ham – really useful for pressing darts, panels and shaping, as they mimic the contour of the body.
Needleboard: These are boards with rows of needles that stand up and position themselves in the pile of the fabric, preventing flattening of the pile. They are great for pressing fabrics with a pile. For an effective alternative, place a spare piece of the fabric pile side up on the ironing board, then put your garment pile side down on top and press.
Pressing cloth – a pressing cloth is a fine piece of muslin that you lay on top of your fabric. When dry, it protects the fabric while you iron; when dampened, it aids pressing and shrinking.
Pressing mat – a portable padded mat that can be placed to protect and pad any work surface so that you can press anywhere.
Бесплатный фрагмент закончился.